How to Clean Your AC Drain Line and Prevent Clogs?
Clogged AC drain lines can be a frustrating problem, but with the right knowledge and tools, they’re simple to address. Regular maintenance, including keeping your AC drain line clean, not only ensures your system works efficiently but also prevents water damage and costly repairs.
This guide will walk you through:
- Understanding why a clean AC drain line is crucial
- Step-by-step instructions on how to clean AC drain line
- Simple tips to prevent future clogs
🤔 Why Cleaning Your AC Drain Line Matters

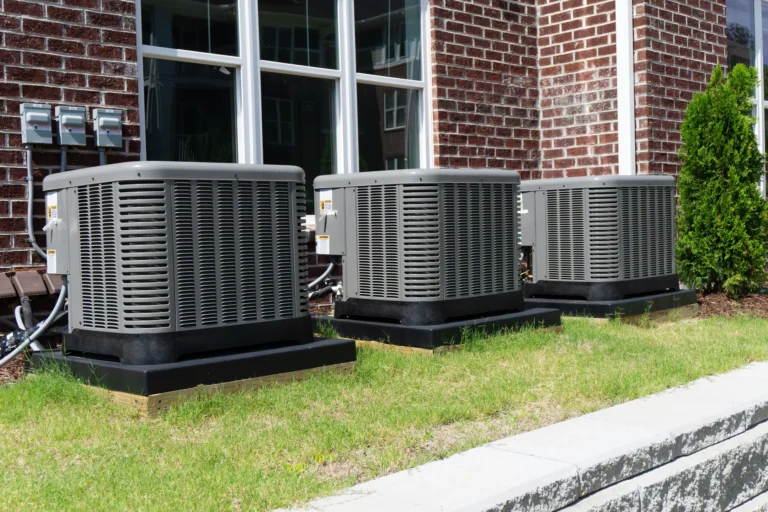
Your AC unit does more than just cool the air; it also removes humidity by converting it into condensation. This condensation is directed through the AC drain line and safely removed from your home. However, over time, the drain line can become clogged with algae, mold, and debris.
If left unchecked, these clogs can cause serious issues such as water damage from overflow, higher utility bills due to reduced efficiency, unpleasant odors and mold growth, and potentially costly repairs.
Signs That Your AC Drain Line Is Clogged
A clogged AC drain line can lead to serious issues if not addressed promptly. It’s important to know what to look for so you can take action before small problems turn into costly repairs. Here are some common warning signs to watch out for:
- Water pooling around your indoor unit
- AC unit shutting off unexpectedly
- Musty odors in your home
- Higher-than-usual humidity indoors
- A full or overflowing drip pan under your AC unit
✅ 6 Steps to Clean Your AC Drain Line Step by Step

Cleaning your AC drain line is easier than you might think. With just a few tools, you can tackle the task in under an hour. Follow these simple steps:
1. Gather Your Supplies
Before attempting to clean your AC drain line, it’s essential to gather all the tools and materials you’ll need. This preparation ensures that the process runs smoothly without interruptions. Start by getting a wet/dry vacuum or a plumber’s snake, as both are highly effective at clearing blockages in the drain line. If you don’t already have one, these tools are readily available at hardware stores or online.
Next, make sure you have a cleaning solution on hand. Distilled vinegar is a great option because it’s natural, affordable, and effective at breaking down debris and killing algae or mold. Alternatively, you can use a commercial AC drain line cleaner specifically designed for this purpose. To pour the solution into the drain line easily, grab a funnel or a small plastic cup that fits the pipe’s opening.
Safety is also crucial, so don’t forget to put on a pair of gloves to protect your hands from any harmful substances or debris. Safety goggles are also recommended to shield your eyes in case of splashes. Lastly, have a clean cloth or towel nearby to wipe up any spills or messes that may occur during the cleaning process. With all these supplies ready, you’ll be fully prepared to tackle the task ahead.
2. Turn Off the Power
Safety should always come first when working on any electrical device, including your air conditioning unit. Before you begin cleaning the drain line, it’s absolutely necessary to turn off the power to the AC unit. Failing to do so puts you at risk of electrical shocks or accidental injuries, especially since you’ll be dealing with liquids and tools.
To turn the power off, locate the AC unit’s power source. Unplug the unit from its outlet if it’s connected to one, or use your home’s electrical panel to switch off the circuit breaker that supplies power to the AC. Make sure the unit is completely powered down before moving forward, as this step is critical for your safety. Taking these precautions will ensure you can work confidently and without unnecessary risks.
3. Locate the Drain Line
Once the power is off and it’s safe to proceed, the next step is to locate the AC drain line. This component is a vital part of your air conditioning system, responsible for carrying away the condensation that forms during the cooling process. Typically, the drain line is made of PVC pipe and is connected to the indoor air handler.
Look for a T-shaped vent along the pipe, as this is usually where you can access the interior of the line. The vent often has a removable cap, which you’ll need to unscrew or pull off to begin the cleaning process. If you’re not sure where the drain line is located, refer to your AC unit’s manual or consult a professional for guidance. Identifying the drain line correctly is essential for successfully clearing any clogs and ensuring your AC system operates efficiently.
4. Clear the Clog
Now that you’ve located the drain line, it’s time to remove any blockages that may be causing it to back up. There are two common methods for clearing clogs: using a wet/dry vacuum or a plumber’s snake. Both are effective, so choose the one you’re most comfortable with or have readily available.
Using a wet/dry vacuum: Take the vacuum hose and attach it to the end of the drain line, which is usually located outside your home. Create a tight seal between the hose and the pipe to ensure strong suction. You can use duct tape, a rubber attachment, or your hand to secure the connection. Turn on the vacuum and let it run for a few minutes to extract the clog. Check the vacuum canister afterward to confirm that debris has been removed. This method is quick, efficient, and ideal for most blockages.
Using a plumber’s snake: If you prefer this method, gently insert the snake into the end of the drain line. Push it through the pipe carefully to avoid damaging the interior lining. When you feel resistance, that’s likely the clog. Slowly twist and maneuver the snake to break up the blockage and pull it out. This method may take a bit more time, but it’s highly effective for stubborn clogs. Be patient and persistent, as a clear drain line is worth the effort.
5. Flush the Line
Once the blockage has been removed, it’s important to thoroughly clean the drain line to prevent future issues. Flushing the line removes any lingering debris and eliminates algae or mold that may have built up inside. To do this, use a cleaning solution like distilled vinegar or a commercial AC drain cleaner.
Pour about one cup of the solution into the T-shaped vent you identified earlier. Use a funnel or a small plastic cup to pour it in slowly and avoid spills. The cleaning solution will work its way through the pipe, breaking down any remaining residue and sanitizing the interior. Let the solution sit in the drain line for about 30 minutes to maximize its effectiveness. This waiting period is crucial, as it allows the cleaner to fully dissolve debris and kill any harmful growths.
6. Rinse and Test
Once the cleaning solution has had time to do its job, the final step is to rinse the drain line and test the system. Start by flushing the line with warm water. Pour the water slowly into the T-shaped vent, ensuring it flows freely through the pipe without any obstructions. Check that the water drains properly and doesn’t back up, as this indicates the clog has been successfully cleared.
After rinsing, it’s time to turn your AC unit back on. Restore power by plugging it in or switching the circuit breaker back on. Monitor the system for a while to ensure it’s functioning correctly and that condensation is draining as it should. If everything looks good, congratulations—you’ve successfully cleaned your AC drain line! Your system is now ready to perform efficiently and keep your home cool and comfortable.
👉 Preventing Future Clogs in Your AC Drain Line

Keep your AC system running smoothly with these simple preventative measures:
Regular Maintenance
Scheduling annual maintenance with a trusted HVAC professional is essential to keep your AC system running efficiently. During these visits, the technician will inspect, clean, and tune your unit, addressing potential issues before they become costly problems. Regular maintenance ensures your system remains in peak condition and extends its lifespan.
Flush the Line Monthly
To prevent clogs and buildup, make it a habit to flush your AC drain line every 1–2 months. Use distilled vinegar or hot water to clear out any debris, dirt, or mold that might accumulate inside the line. This simple preventative measure can help you avoid costly repairs and ensure your AC operates smoothly.
Check the Drip Pan
The drip pan collects excess moisture from your AC unit, so it’s important to inspect it regularly. Check for any water accumulation or signs of damage, such as cracks or rust. Clean the pan as needed to eliminate mold growth and prevent water from spilling over and causing damage.
Install a Float Switch
A float switch is a small but critical device that can prevent major water damage. It shuts off your AC unit automatically if the drain line becomes clogged, stopping water from overflowing. Installing a float switch is a proactive way to protect your home and avoid expensive repairs caused by leaks.
Use an Algaecide
Algae growth in your AC system can lead to clogs and unpleasant odors. To combat this, place algaecide tablets in the drain pan. These tablets inhibit algae growth and keep your system clean and functioning properly, reducing the chance of clogs and improving overall efficiency.
🛠️ AC Drain Maintenance
At Bob’s Air Conditioning, we understand that maintaining your AC system can feel overwhelming, but it doesn’t have to be. With over 40 years of industry experience, our licensed and insured team is here to handle all your air conditioning needs with expertise and care.
From cleaning your AC drain line to full system repairs, we prioritize your comfort, satisfaction, and peace of mind. Let us help keep your home cool and your AC running efficiently year-round. Contact Bob’s Air Conditioning today to schedule your maintenance or repair service and experience the difference of working with a trusted, reliable team. Call now or book online to get started!
Ultimate Comfort Awaits